While I'm temporary distanced from my PC I got chance to do an interview for FlightSim.com. For those who missed it here it is.

Wednesday, November 6, 2013
Monday, March 18, 2013
Texturing I: The engine
For several reasons I decided to texture the engine before I move to the cockpit modeling. I never did texturing of 3D model before so I was expecting a lot of learning. Also wanted to check how my way of modeling affects texturing. For example I found that repetitive parts is better to duplicate by Alt+Enter in the blender so later only one instance is required to be textured. All duplicates are automatically textured at the same time.
It took me lot of trial and errors to figure out how things are working. One has to switch his mind from technical, modeling thinking to more artistic way :). My goal was to use just 512x512 texture while level of details will be still good. To acheive this I could not simply unwrap all the parts and paint them. I had to think how to reuse particular areas of the texture. With combination of specular and normal map pretty satisfying results were acheived.


 Some things may still change as I learn some new techniques in future. But for now I'm quite satisfied with the result.
I prepared one "trailer" video displaying the textured engine using dramatic soundrack ]:-). Enjoy!
Some things may still change as I learn some new techniques in future. But for now I'm quite satisfied with the result.
I prepared one "trailer" video displaying the textured engine using dramatic soundrack ]:-). Enjoy!
-Joe


-Joe
Friday, November 16, 2012
Blender Mdelling VIII: Engine pt. 3
 The engine unit is getting close to finish. Though there are still some minor details to be added, it already looks great. I successfully applied main animations related to the engine extension. Most challenging was a properller-stopper assembly. I wanted to make it fully working as in real thing. It is a very little detail however the final result adds a lot to the realism of the whole model. The spring in that assembly is also fully animated. It means it extends/compresses as the lever catches the "pad". I found it very hard to notice, so it is probably just for making me feel better about it :) . FPS are still very good. Just couple less then default X-Plane's ASK21. So no need to worry about over-animating.
 Applied animations:
Engine unit extension
Doors opening
Working Propeller-stopper
Propeller rotation
Muffler disconnecting
I started to intensively work on the finalization of the DG 1001 M . It means I work on it almost on daily basis. Goal is to deliver one nice X-mas present :). But can't promise anything yet. At least you may be looking for more often updates ;)
See you soon!
-Joe
Monday, September 17, 2012
Blender Modeling VIII: Engine pt.2
 Thanks to DG1001M service manual I managed to model the engine unit frame quite precisely. Though it took its time to read all the detail drawings and get all pieces one by one assembled into one big picture.
Then I continued adding various sub-assemblies onto it. Interesting one is a propeller-stopper. It blocks propeller from rotating while engine is retracted or in process of extension/retraction. Sure I will animate this later :). I really enjoy getting the things to work as in real. (Part attached to a fuselage are not displayed on the pic)
Another interesting part to model was the propeller. I started with low poly model which did't look good enough for me in closer look so I decided to go for more polys to achieve this...

Finally I was curious to see how it will perform in the xpl. Here is a short clip showing extension of the engine and start up...
And the whole engine as it looks currently:

-Joe
Wednesday, April 18, 2012
Blender Modeling VIII: Engine pt.1
It's been long time since my last update. Time I can dedicate to the project has reduced recently. But don't worry the project is not dead :) I was working on accurate model of the engine. In first part I modeled the engine itself. In second part I will add propeller and muffler assemblies. The model might look like wasting of polygons but actually each piece I modeled using as few polys as possible. At the end, once the engine will be placed in the glider I will do another polygons reduction (not visible ones).
-Joe


-Joe


Friday, March 16, 2012
Animation: Exterior animations
-Joe
Wednesday, March 14, 2012
Animation: Gear suspension
I managed to animate the spring compression exactly as desired. Final result can be seen in the following video captured in X-plane 10 (with default quick time.)
-Joe
-Joe
Friday, March 9, 2012
Blender Modeling VII: Ready for animation
I finished with modeling exterior for now. All parts needed to set up external animations (main gear, tail wheel, gear doors, speed brakes, control surfaces,...) are done so the model is ready for animation applying.
Here are some of my render attempts in the blender


Here are some of my render attempts in the blender


Tuesday, February 28, 2012
Blender modeling VI: Tail wheel
After a little pause I did continue with a tail wheel assembly. The tail wheel is steerable allowing the plane to taxi. It is linked to the rudder control by springs. Modeling included also improvement of fuselage shape around the tail wheel.


Now I will continue with completion of exterior model, adding some details. Adding animations and some basic texturing. Then I'd like to check it in xplane, see how it all works.
-Joe
 |
| Tail wheel |


Now I will continue with completion of exterior model, adding some details. Adding animations and some basic texturing. Then I'd like to check it in xplane, see how it all works.
-Joe
Monday, February 6, 2012
Blender modeling V: Wings
I wanted to model wings as they are in real. It means that wings can be detached from the fuselage. Thus it required a bit of work also on the fuselage to achieve a nice and smooth transition to the point of connection. Also here I tried to model the rounding as close as possible to reality. I did notice that it is not equal around the whole airfoil shape.


Ailerons are modeled so that one can notice them even in neutral position. A little gaps did the job very well.

Aileron link is modeled as a separated mesh. There is not much rounding visible (on real thing) where it connects to wing/aileron surface. There are some details where more sufficient will be to use normal map or just texture.
I'm thinking about having an option between 18 m and 20 m wingspan. But first I wnat to have done the 20 m one then I'll be playing more with options (e.g a variant w/o engine and 18 m wingspan).


Ailerons are modeled so that one can notice them even in neutral position. A little gaps did the job very well.

Aileron link is modeled as a separated mesh. There is not much rounding visible (on real thing) where it connects to wing/aileron surface. There are some details where more sufficient will be to use normal map or just texture.
 |
| Aileron link |
I'm thinking about having an option between 18 m and 20 m wingspan. But first I wnat to have done the 20 m one then I'll be playing more with options (e.g a variant w/o engine and 18 m wingspan).


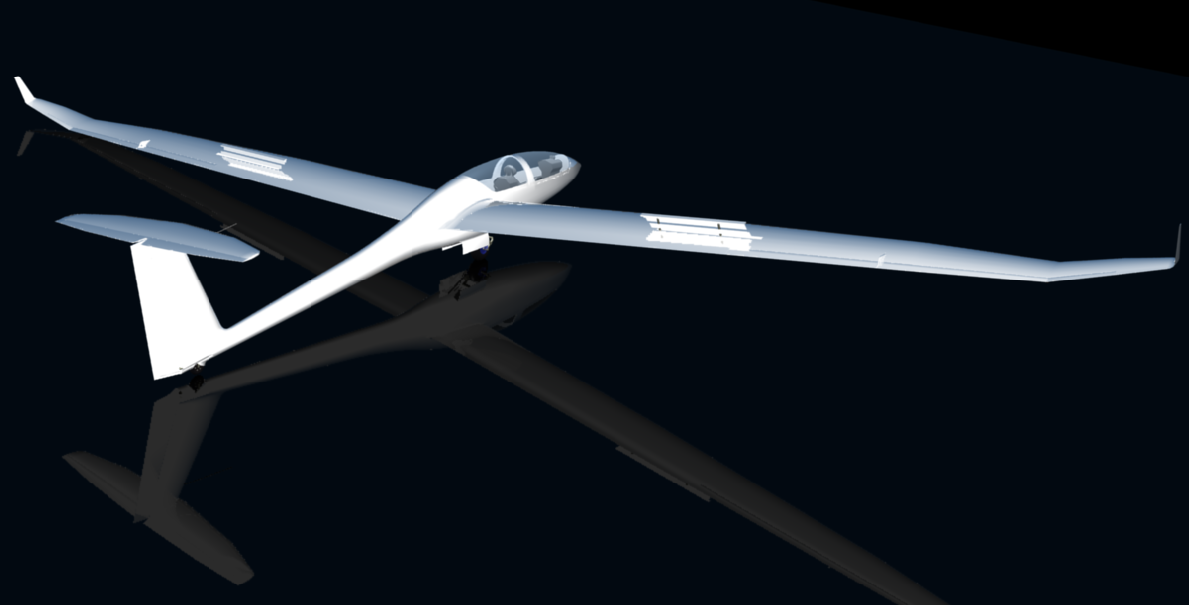
Last thing to model on wings was an opening for airbrakes. The airbrakes will be modeled separately. And here is the whole model for now. Starting to look like a glider :)

Next I will continue with airbrakes modeling. Then adding the main gear assembly and modeling tail wheel (steerable).
-Joe
Subscribe to:
Comments (Atom)