-Joe

Showing posts with label Blender. Show all posts
Showing posts with label Blender. Show all posts
Friday, March 16, 2012
Animation: Exterior animations
-Joe
Wednesday, March 14, 2012
Animation: Gear suspension
I managed to animate the spring compression exactly as desired. Final result can be seen in the following video captured in X-plane 10 (with default quick time.)
-Joe
-Joe
Friday, March 9, 2012
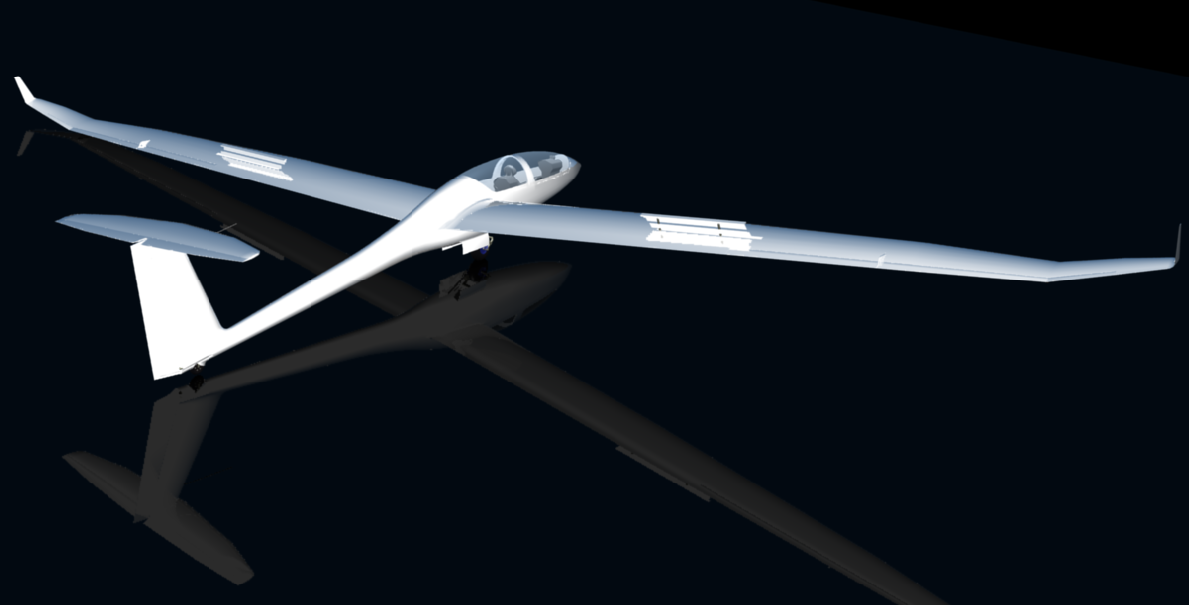
Blender Modeling VII: Ready for animation
I finished with modeling exterior for now. All parts needed to set up external animations (main gear, tail wheel, gear doors, speed brakes, control surfaces,...) are done so the model is ready for animation applying.
Here are some of my render attempts in the blender


Here are some of my render attempts in the blender


Tuesday, February 28, 2012
Blender modeling VI: Tail wheel
After a little pause I did continue with a tail wheel assembly. The tail wheel is steerable allowing the plane to taxi. It is linked to the rudder control by springs. Modeling included also improvement of fuselage shape around the tail wheel.


Now I will continue with completion of exterior model, adding some details. Adding animations and some basic texturing. Then I'd like to check it in xplane, see how it all works.
-Joe
 |
| Tail wheel |


Now I will continue with completion of exterior model, adding some details. Adding animations and some basic texturing. Then I'd like to check it in xplane, see how it all works.
-Joe
Monday, February 6, 2012
Blender modeling V: Wings
I wanted to model wings as they are in real. It means that wings can be detached from the fuselage. Thus it required a bit of work also on the fuselage to achieve a nice and smooth transition to the point of connection. Also here I tried to model the rounding as close as possible to reality. I did notice that it is not equal around the whole airfoil shape.


Ailerons are modeled so that one can notice them even in neutral position. A little gaps did the job very well.

Aileron link is modeled as a separated mesh. There is not much rounding visible (on real thing) where it connects to wing/aileron surface. There are some details where more sufficient will be to use normal map or just texture.
I'm thinking about having an option between 18 m and 20 m wingspan. But first I wnat to have done the 20 m one then I'll be playing more with options (e.g a variant w/o engine and 18 m wingspan).


Ailerons are modeled so that one can notice them even in neutral position. A little gaps did the job very well.

Aileron link is modeled as a separated mesh. There is not much rounding visible (on real thing) where it connects to wing/aileron surface. There are some details where more sufficient will be to use normal map or just texture.
 |
| Aileron link |
I'm thinking about having an option between 18 m and 20 m wingspan. But first I wnat to have done the 20 m one then I'll be playing more with options (e.g a variant w/o engine and 18 m wingspan).


Last thing to model on wings was an opening for airbrakes. The airbrakes will be modeled separately. And here is the whole model for now. Starting to look like a glider :)

Next I will continue with airbrakes modeling. Then adding the main gear assembly and modeling tail wheel (steerable).
-Joe
Tuesday, January 31, 2012
Blender modeling IV: Main gear
Yes I planned to do wings as next.Wings modeling is already in progress but not done yet (less free time at home last week). Fortunately I had some spare time in my job so I decided to do some modeling there as well (don't tell my boss ;) ) in parallel. Main wheel assembly seemed to be a good choice. I downloaded a service manual for DG 1001M where pretty detailed drawing of the main gear is and stared modeling. And here is the result...


Colors were applied just for better separation of parts. The spring differs a little bit. Original has a more rectangular like profile comparing to the circular I have used. I'm aiming to animate compresion of the spring so the rectangular profile would be a problem then. Also I do intend to use normal maps for texturing so some more details will be added.
Next (hopefully) the wings will be done :)
-Joe
Sunday, January 22, 2012
Blender modeling III: Tail
I did continue with the tail area. Modeled horizontal and vertical stabilizer. Moving control surfaces.


And here all together with some mterials applied...

Nex I want to do wings.
-Joe


And here all together with some mterials applied...

Nex I want to do wings.
-Joe
Sunday, January 15, 2012
Blender modeling II: Canopy
Main parts of the canopy are glass and frame. It was quite hard to model the frame (visible from inside) with proportions that will match ones that can be seen on varios pictures. I decided to model the frame in one part together with piece of glass that is not translucent (white) to ease up later texturing.
It took me three attempts to get about proper proportions. For now I'm not adding any bevels to fine out edges or similar. There are still some details to add.
This is how looks the whole canopy


And some teaser here as well ;)

There are some parts of the cockpit I made before I "oficially" started the project.
-Joe
 |
| Canopy frame with part of glass. |
It took me three attempts to get about proper proportions. For now I'm not adding any bevels to fine out edges or similar. There are still some details to add.
This is how looks the whole canopy


And some teaser here as well ;)

There are some parts of the cockpit I made before I "oficially" started the project.
-Joe
Saturday, January 7, 2012
Blender modeling I: Fuselage
The x-plane's plane maker supports exporting all parts to *.obj format so one can use them later to create more detailed replacements. However I found the mesh density not sufficient for further fine modeling. So I decided to create the fuselage from scratch. Prepared high resolution top and side view pics (from a pdf downloaded from the DG's homepage). Blender base unit equals to 1 m so scaling and positioning of the background images was easy. To double check and comparsion I put original plane maker parts in other layer.
I decided to use 36 verticies for a fuselage section (compared to 16 from the plane maker). Sections spread is 0,2 m in most cases. Result looks as following:

Scaling the sections by X and Y axes however results in model that follows just max dimensions in the given view. Resulting section shape is more less elliptical. From looking at dozens of photos :) I found the DG1001 fuselage in cockpit area is not narrowing towards the bottom so steep as I get by simple scaling. Looking at several photos I figured out how it should be approximately...

And here it is. The fuselage...

Next I'll continue with canopy. Some more serious modeling :)
Subscribe to:
Posts (Atom)